
Introduction
The concept of infrastructure as Code has revolutionised the way servers are provisioned. Once reserved for entreprise-grade setups, nowadays IaC is easily configurable in a home setup with popular open-source tools such as Terraform, enabling an automated and easily maintainable environment. In this post I will be going through installation of Terraform and provisioning a new server on Proxmox Server using Terraform configuration files.
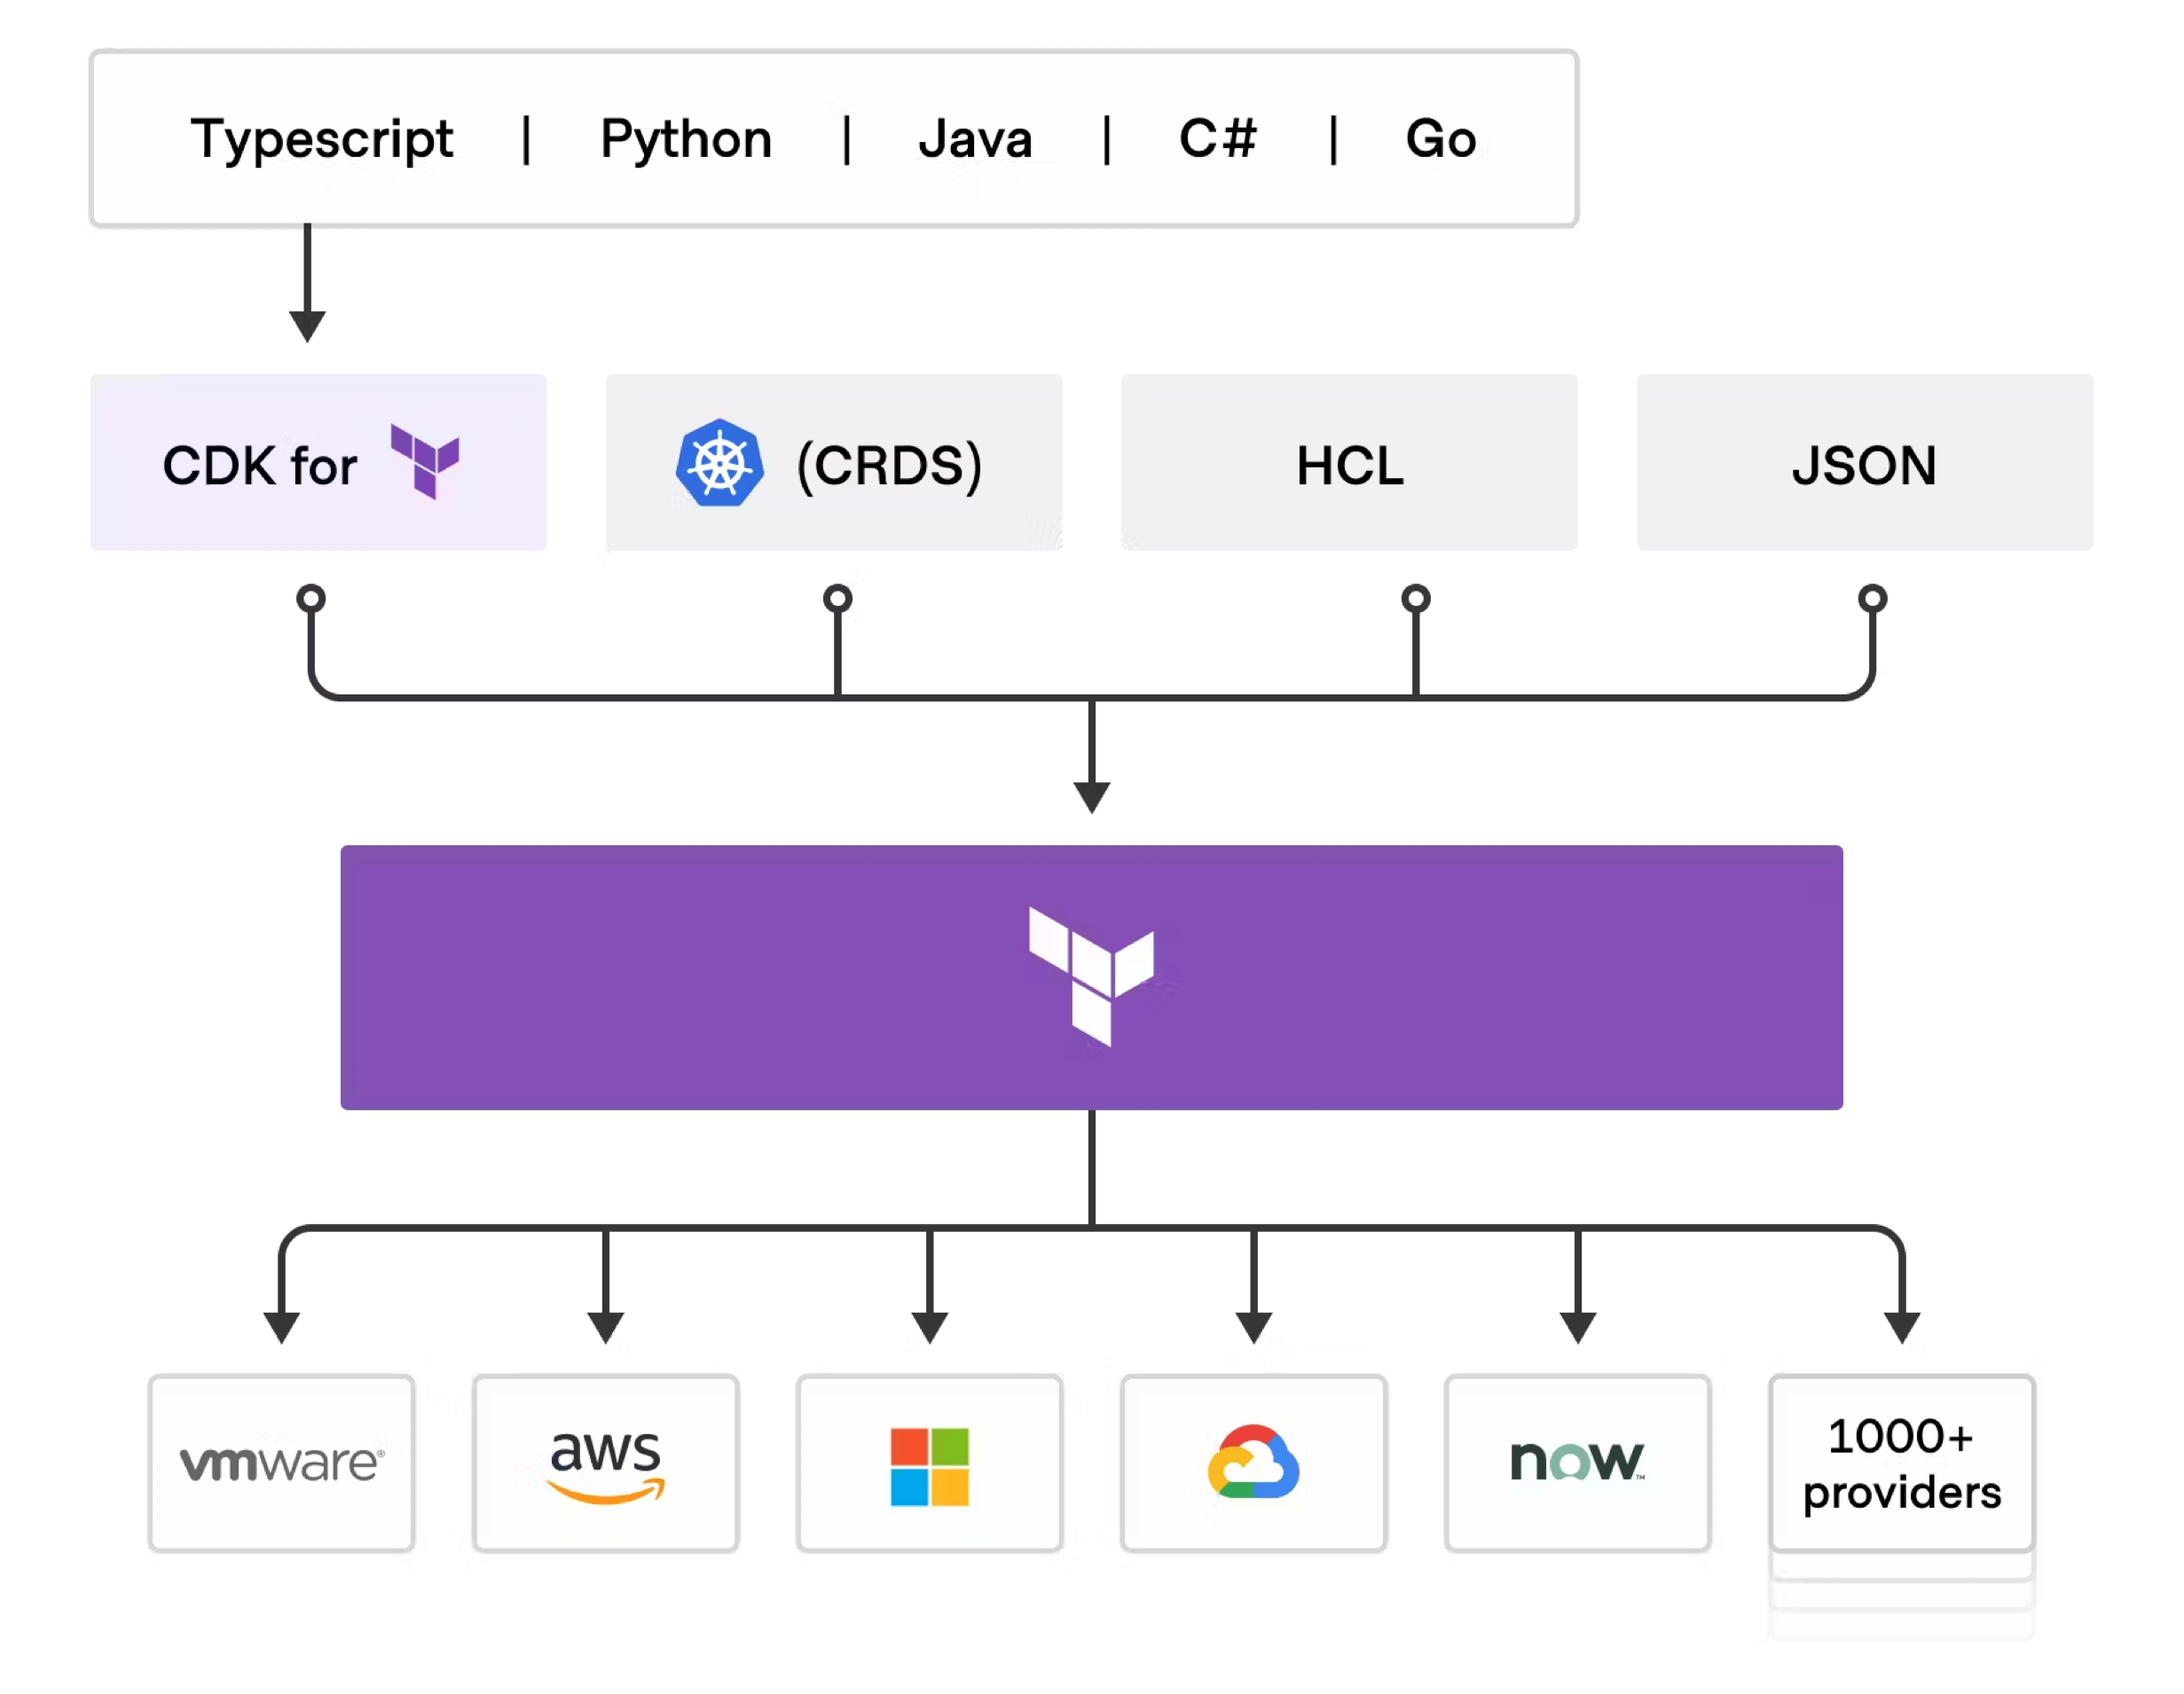
Terraform takes the code that describes the desired state of infrastructure and based on that, automatically configures an infrastructure, service or even cloud resource.
[Good to know vocabulary]
Resource: Infrastructure object being managed by Terraform
Provider: Terraform Plugin responsible for understanding API interactions for each type of external resource
Resource Block: Code block used to define and configure the infrastructure resources
[Links]
Terraform Homepage: https://www.terraform.io/
1. Terraform Installation
1.1 Install Terraform on MacOS
1
2

brew tap hashicorp/tap
brew install hashicorp/tap/terraform
1.2 Prep Proxmox Server
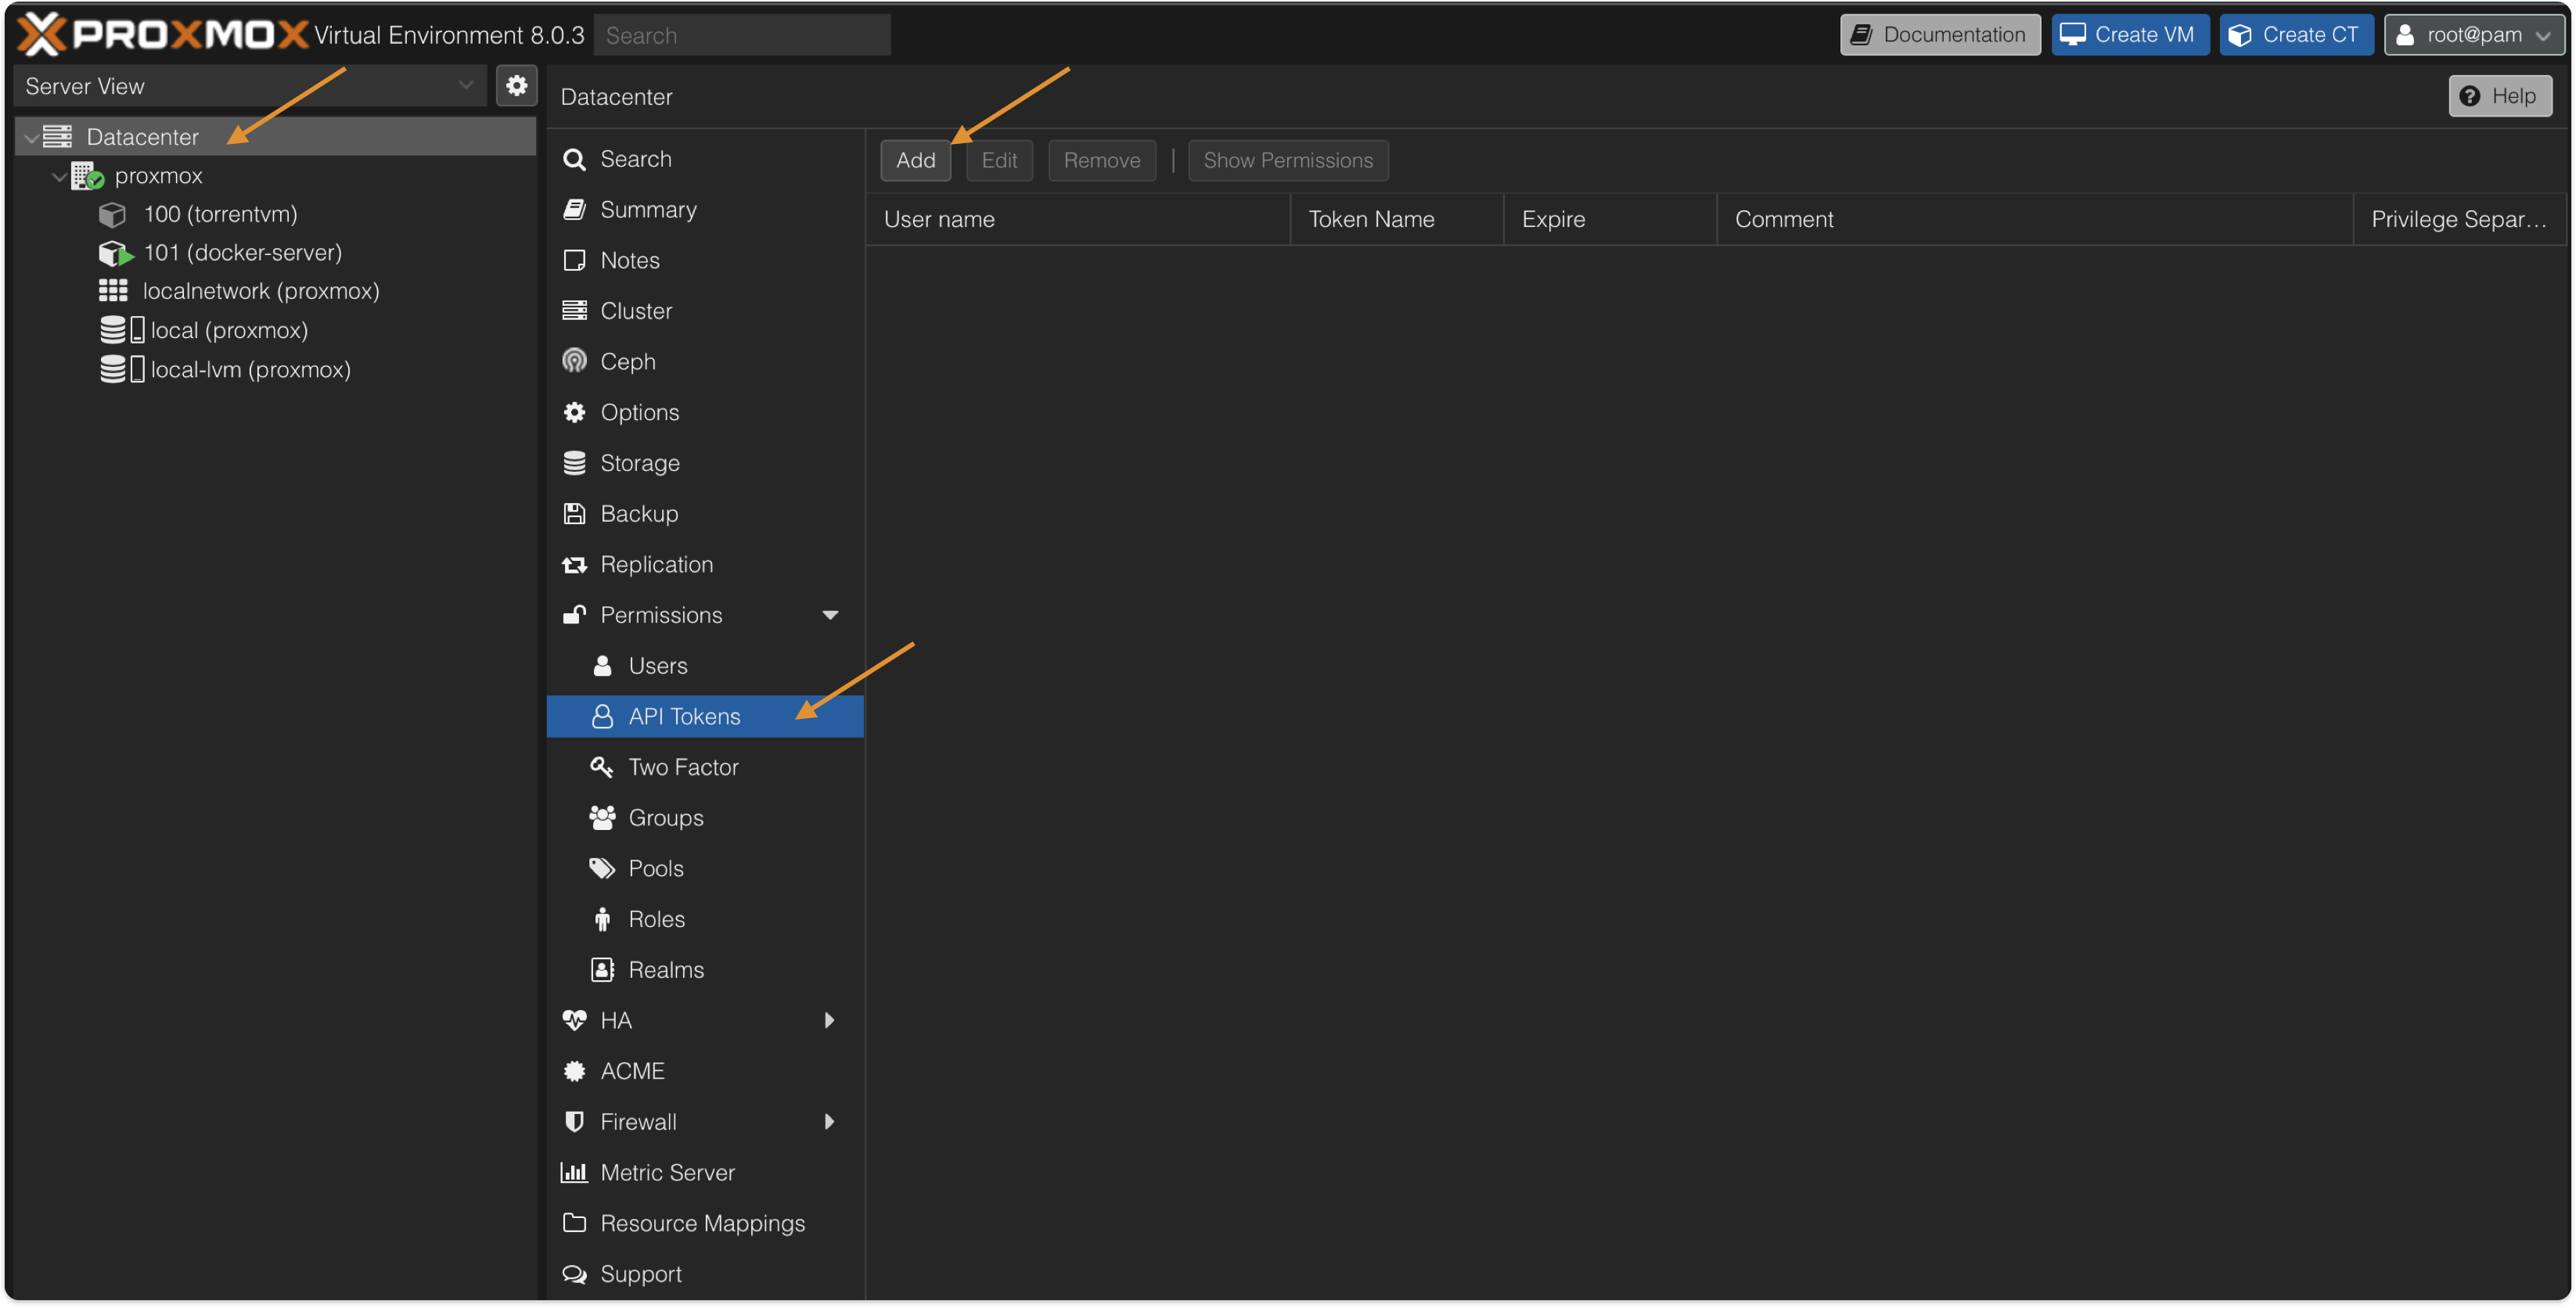
To accept remote connection, we need to generate an API Token.
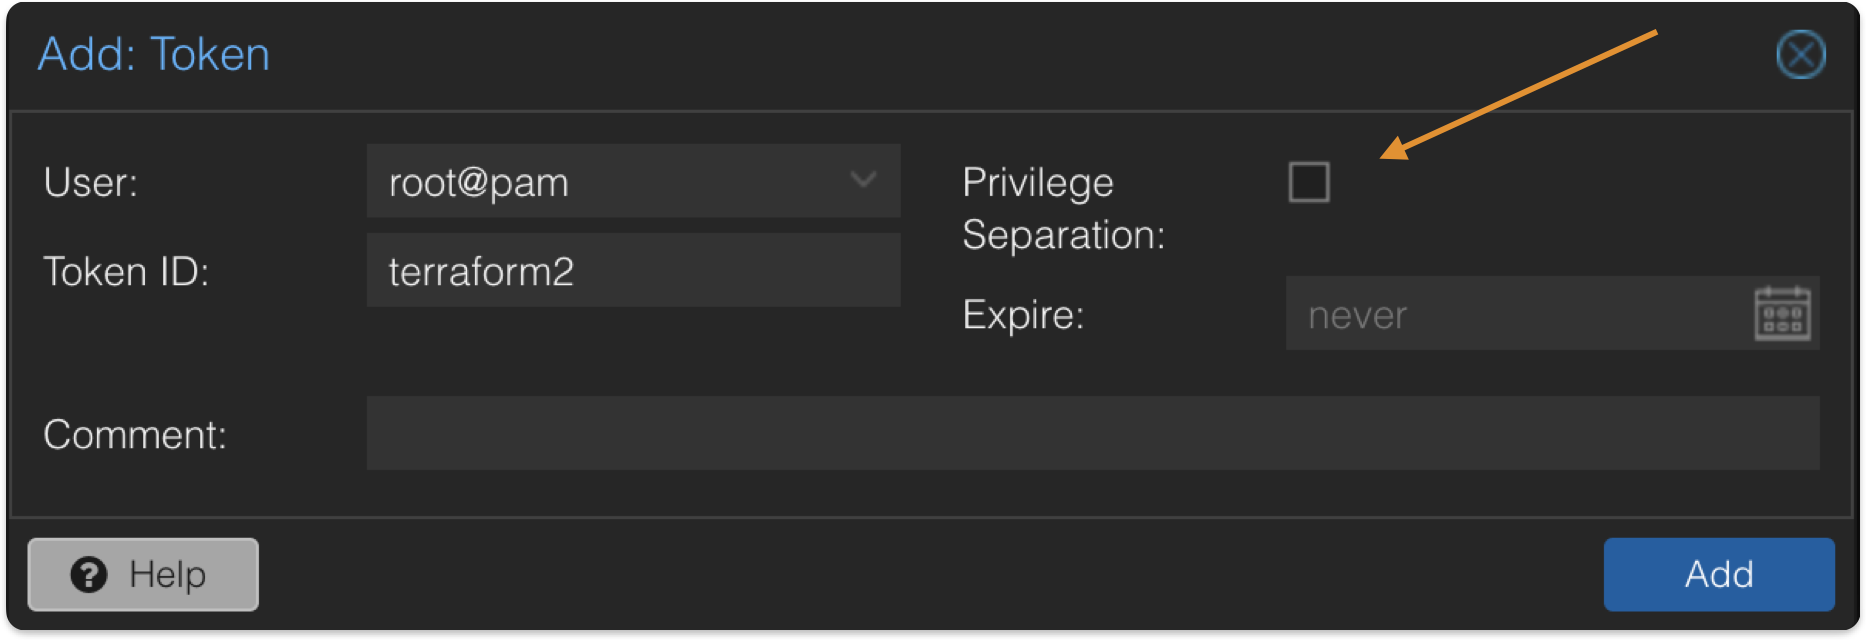
Open Proxmox server -> Select Datacenter -> Permissions -> API Tokens -> Add Token ID -> Unselect Privilege Separation. Copy the Token ID and secret to configure later in Terraform.
Unselecting Privilege Separation grants the API Token Full access to the system
2. Terraform Configuration
2.1 Provider configuration file
Create a “provider.tf” file in project folder. Configuration needs an API Token ID, Token secret and API URL. For security reason these are not added to the configuration file as plain text and instead using from environment variable.
For each variable value referenced there should be an environment variable with “TF_VAR_” added in front.
For example, var.exampleurl -> TF_VAR_exampleurl
API URL format - “https://your-proxmox-host:8006/api2/json”
API Token ID format - “user@pam!terraform2”
Token ID contains a ! characher. In Zsh, the ! character has a special meaning and is used for history expansion. To avoid getting error, use Single Qoutes ( ‘ ) to enclose the entry value. Or if using double quotes to enclose the value, escape the charater using a backslash \
1
2
3
4
5
6
7
8
9
10
11
12
13
14
15
16
17
18
19
20
21
22
23
24
25
26
27
28
29
30

# Proxmox Provider

terraform {
    required_version = ">= 0.13.0"
    required_providers {
        proxmox = {
            source = "telmate/proxmox"
        }
    }
}

variable "proxmox_api_url" {
    type = string
}
variable "proxmox_api_token_id" {
    type = string
}
variable "proxmox_api_token_secret" {
    type = string
}

provider "proxmox" {
    pm_api_url = var.proxmox_api_url
    pm_api_token_id = var.proxmox_api_token_id
    pm_api_token_secret = var.proxmox_api_token_secret

    # Skip TLS Verification
    pm_tls_insecure = true
}
2.2 Terraform Configuration Files
Create configuration file create_vm.tf. In this file, I will add configuration to state infrastructure that I want to have on Proxmox server. First example is to configure a VM and second one is to configure a Container, can use either or both.
1
2
3
4
5
6
7
8
9
10
11
12
13
14
15
16
17
18
19
20
21
22
23
24
25
26
27
28
29
30
31
32
33
34
35
36
37
38

# Create VM in Proxmox with Terraform

resource "proxmox_vm_qemu" "docker-server" {
    name = "docker-server"
    target_node = "proxmox"
    iso = "local:iso/ubuntu-23.04-live-server-amd64.iso"
    agent = 1

    # VM CPU Settings
    cores = 2
    sockets = 1
    cpu = "host"
    memory = 2048

    # VM Network Settings
    network {
        bridge = "vmbr0"
        model  = "virtio"
    }

    disk {
        size      = "32G"
        type      = "scsi"
        storage   = "local-lvm"
    }
    agent = 1   # run qemu agent on guest

//    onboot = true   # start server on boot
//		clone = "template-server"   # clone from existing VM
//    os_type = "cloud-init"
//    ipconfig0 = "ip=192.168.86.150/24,gw=192.168.86.1"
//    nameserver = "1.1.1.1"
//
//    sshkeys = <<EOF
//    ssh-rsa AAAAB.....omitted
//    EOF

}
1
2
3
4
5
6
7
8
9
10
11
12
13
14
15
16
17
18
19
20
21
22
23
24
25
26
27
28
29
30
31
32
33
34
35
36
37
38

# Create Container in Proxmox with Terraform

variable "vm_password" {
    type = string
}
resource "proxmox_lxc" "Container1" {
    vmid = 155
    hostname = "Container1"
    target_node = "proxmox"
    ostemplate   = "local:vztmpl/debian-12-standard_12.0-1_amd64.tar.zst"
    unprivileged = true
    password = var.vm_password

    rootfs {
      storage = "local-lvm"
      size    = "32G"
    }
    onboot = true   # boot on start
    start = true    # start after creation
    cores = 2
    memory = 2048
    swap = 2048

    network {
      name   = "eth0"
      bridge = "vmbr0"
      ip     = "192.168.86.155/24"
      gw     = "192.168.86.1"
    }

    ssh_public_keys = <<-EOT
      ssh-rsa AAAAB...omitted
    EOT

    features {
      nesting = true   # ability to run virtualization software. eg Docker
  }
}
3. Provision Infrastructure
Initialize configuration
1

terraform init
Preview the changes that Terraform will make
1

terraform plan
Apply provisioning
1

terraform apply -auto-approve
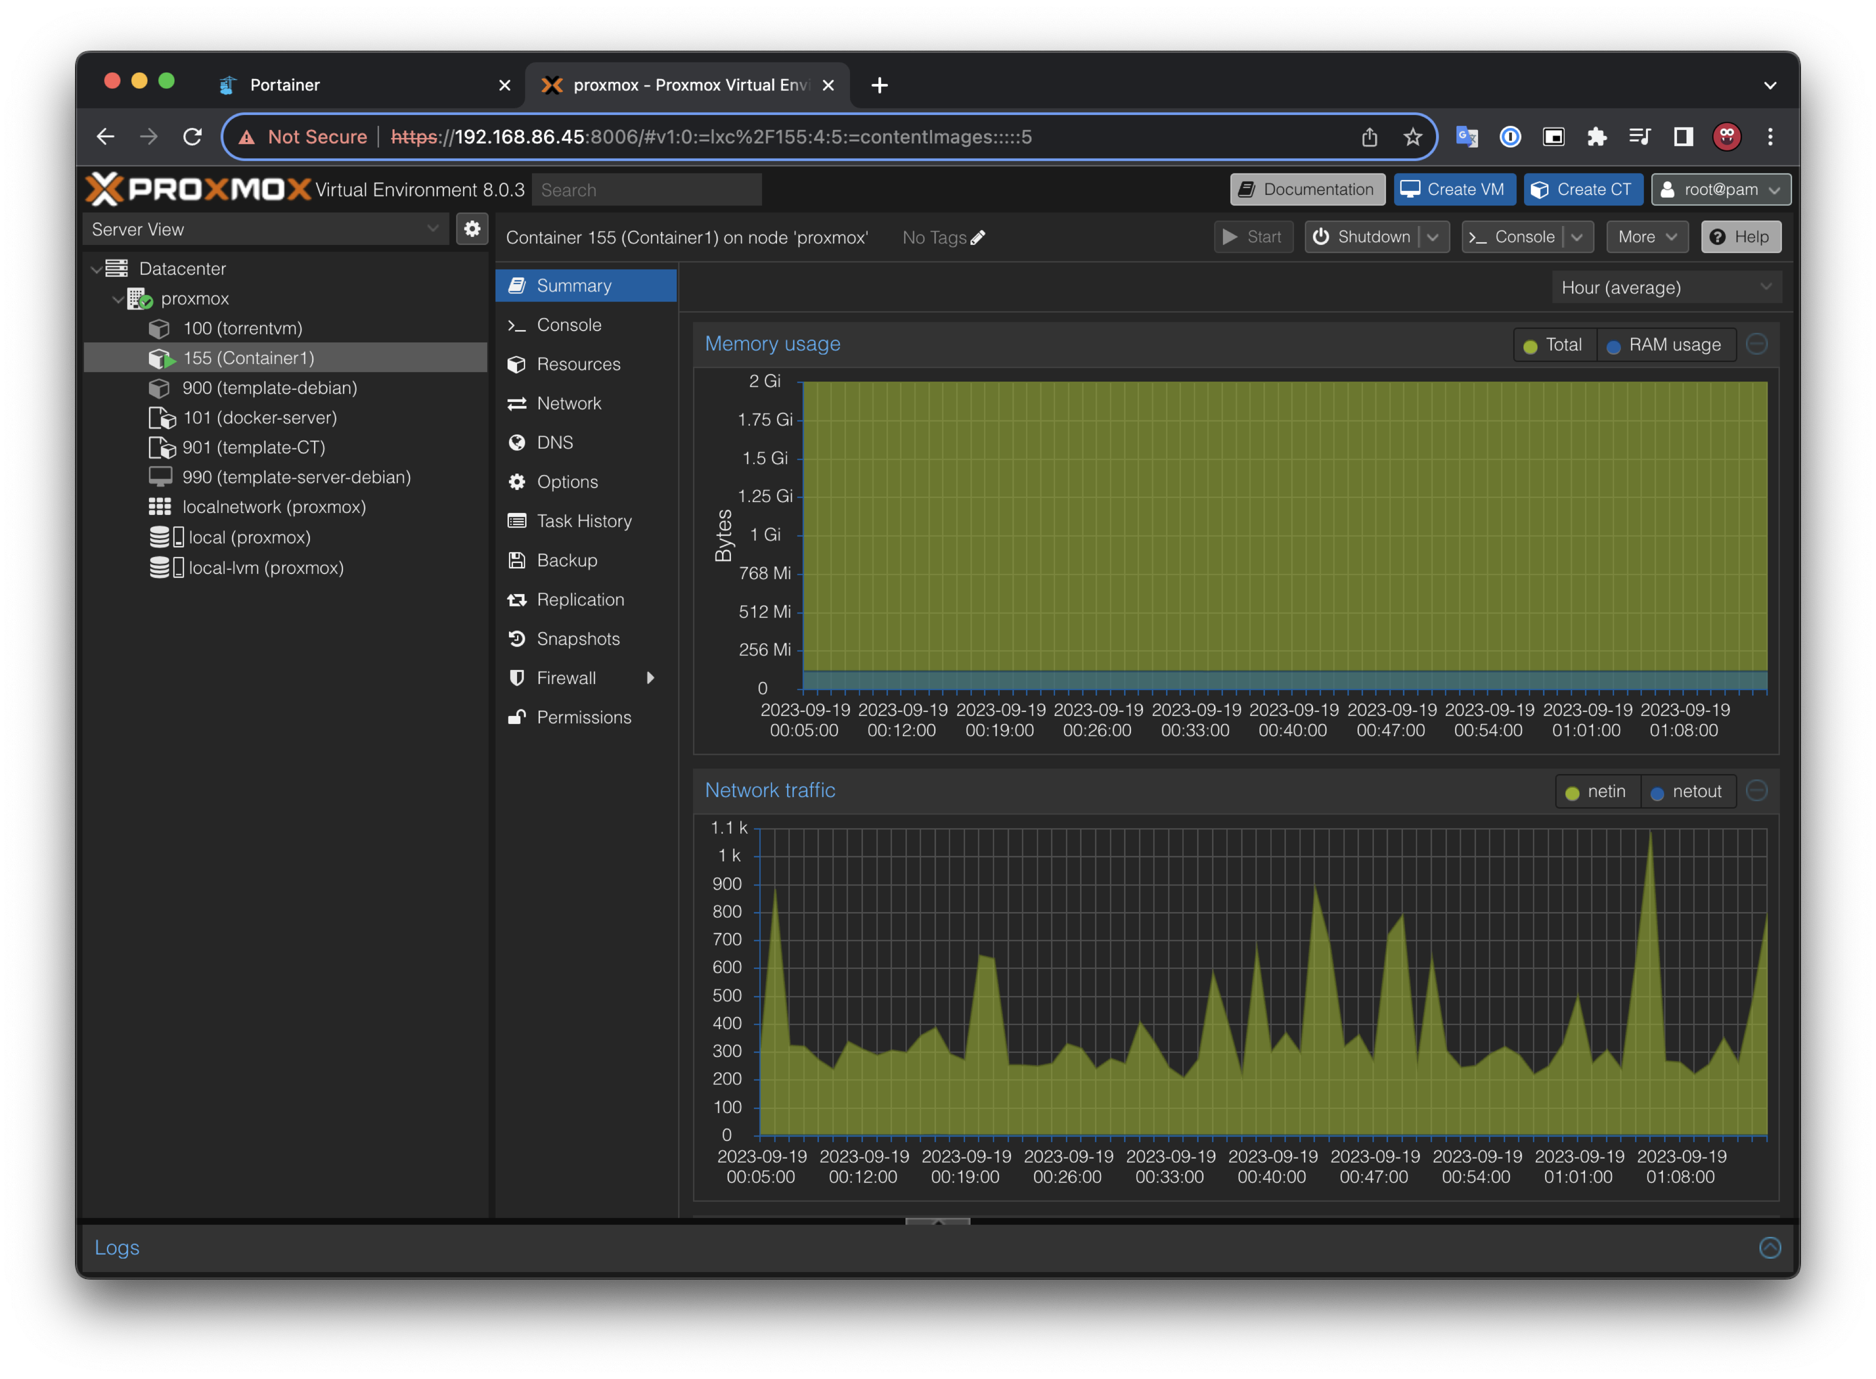
Provisioning is completed with 2 clicks and Container is created in 8 seconds !!

Comments powered by Disqus.